 MISO
MISOSamples Tutorial
1. Logging in
You need to log in to MISO LIMS in order to make changes to any LIMS entities. Logging in lets MISO record any changes you make on entities you have access to.
If you are a new user, you will need
to contact helpdesk@oicr.on.ca so that they put you into the appropriate
Active Directory group, MISO_ROLE_INTERNAL.
Try to log in now:
- Click on http://miso.gsi.oicr.on.ca.
- Enter your username (e.g. jdoe) and password and click the Login button.
MISO uses the same username and password as your OICR email account.
If all goes well, you should see the MISO Dashboard and see a message at the top right: "Logged in as: jdoe".
2. Receiving samples
A sample contains information about the material upon which the sequencing experiments are to be based. Samples can be used in any number of sequencing experiments in the form of a library that is processed further into single or pooled library aliquots.
Every received sample must have an identity. The identity corresponds to the individual or organism from whom the sample originated, i.e. the donor. MISO requires you to assign an external name, which is usually an identifier from another institution like a Donor ID.
When sample material is received, it may come in many different forms, called sample classes in MISO. Sample classes are divided into sample categories, including
- Tissue
- Tissue Processing
- Stock
- Aliquot
Depending on which sample category is chosen, different fields appear on the Create Sample page, as these categories have different information associated with them.
In this workshop, we will create six samples with four different identities in the project you created in the last session.

2.1 Entering a Tissue
All samples in MISO are entered using the bulk entry screen. We will start by entering a single tissue sample from the
donor PROJ_ID1.
- On the left hand menu under Preparation, click Samples.
- Click the Create button at the top left of the table.
- Select Sample Category
Tissueand Quantity1. - Click Create.
- Enter or select the following in the table:
-
Sample Name: leave blank. This will be auto-generated after save.
- Sample Alias: leave blank. This will be auto-generated based on other information in this form.
-
Description:
Reference 1. - Date of Receipt: Select a date
- Time of Receipt: Enter a time
- Received From: Select any lab
- Received By: Select any group. If there are no options in the dropdown, ask your MISO administrator to add you to an appropriate group.
- Matrix Barcode: Use the hand-scanner or type a barcode into the pop-up.
If you weren't given any barcodes to use, enter one like
PROJ-101, replacingPROJwith your project's short name. Record the barcode on your worksheet.
-
Project: Select the short name of the project you created in the last exercise.
-
Subproject: Select the subproject you created. If the subproject does not appear in the dropdown, you may need to refresh the page and re-enter the above information. It can sometimes take a few minutes for the new subproject option to become available.
- Sample Type: select
GENOMICfrom the drop down. -
Scientific Name:
Homo sapiens. - External Name: this is the name of the individual donor, whether internal or
external. For example, an external name would be "Morgan" (internally we refer to
her as plain ol' MORG_0001).
- Enter
PROJ_ID1in the External Name field, replacingPROJwith your project's short name. Record this in your worksheet.
- Once you enter an external name, MISO will go and find any existing donors with external name(s) that match this, and will add them to the dropdown menu for the Identity Alias field.
- If there are no existing donors with the exact external name, the option of
First Receipt (project short name)will be available. - If more than one option is available in the Identity Alias dropdown, the cell will be displayed with a light purple background.
- Enter
- Select
First Receipt (project short name)for the Identity Alias. - Donor Sex: Select any item from the dropdown.
- Tissue Origin:
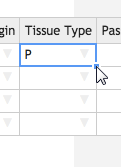
Ly (Lymphocyte) - Tissue Type:
R (Reference or non-tumour, non-diseased tissue sample) - Times Received:
1 - Tube Number:
1 - Secondary ID:
BioBankID 1. This is the Biobank ID or Tube ID. It may also be left blank. - Material: Select any from the drop-down.
- Timepoint:
T1 - QC Status: select
Readyfrom the drop down.
-
- At the upper right hand side, click Save.
Upon saving, a number of fields will be filled in, including the sample ID, name, and alias. The name will be in the
form "SAM123", where "123" is the ID. This is a unique identifier for the sample within MISO. The alias will be
generated based on the naming scheme configured for your site. This is a more human-friendly identifier for the sample.
Record the alias in your worksheet.
2.2 Automatically created Samples
- Click the Projects link under Preparation in the menu on the left side of the screen and select your project from the list.
- Open the Samples section on the Edit Project page to see your newly created samples.
You can also find your samples by searching on the Samples page or by using the widget on the MISO front page; however, the widget does not show enough information for the following exercises.
You only created a single sample but at least two are in this list: the Tissue as well as the Identity. The Identity sample was automatically created because you provided an External name that had not been previously used in this project. Other types of samples are created automatically depending on how you propagate them through to libraries. Some of them will be addressed in the following tutorials.
2.3 Entering bulk Tissues
Next, we will create four more Tissue samples for individuals 1-4.
- On the left hand menu under Preparation, click Samples.
- Click the Create button at the top left of the table.
- Choose Sample Category
Tissueand Quantity4. - Click Create.
A table will appear with the requested number of samples in table format. We will fill in the first row and use the quick-fill feature to fill in the rest of the table.
- Select or enter the following data in the first row only:
-
Name: leave blank. This will be automatically generated after save.
-
Alias: leave blank. Again, this will be automatically generated.
- Date of Receipt: Select yesterday's date.
- Time of Receipt:
9:00 am - Received From: Select any lab.
- Received By: Select any group.
-
Project: Select your project's short name from the drop-down.
-
Subproject: Select the subproject you created.
- Sample Type:
GENOMIC -
Sci. Name:
Homo sapiens - Donor Sex: Select any item from the drop-down.
- Tissue Origin:
Br (Breast) - Tissue Type:
P (Primary Tumour) - Times Received:
1 - Tube Number:
1 - Secondary ID:
BioBankID 2. - Material: Select any item from the drop down.
- Tiempoint:
T1 - QC Status:
Ready
-
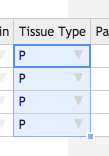
Now we will fill in the rest of the table. Like in Excel, you can fill down a column by double-clicking the square in the lower right hand corner of a selected cell. You can also click and drag to only fill in a certain number of cells.
|
|
Copy and pasting from Excel and Word is supported. Press Ctrl+V (Windows & Linux) or Command+V (Mac) on your keyboard to paste into the selected cell(s).
- Click the Date of Receipt cell in the first row. A blue square will appear at the lower right hand corner of the cell. Double click it to fill in the rest of the column with the same date.
- Fill in the columns in the same way for: Time of Receipt, Received From, Received By, Project, Sample Type, Sci. Name, Subproject, Donor Sex, Tissue Origin, Tissue Type, Times Received, Tube Number, Material, Timepoint, and QC Status .
-
Copy text from another program and paste it into the Description cell.
- Matrix Barcode: you would normally use a hand-scanner or copy and paste a list of
barcodes from a spreadsheet. For each sample, select a barcode and scan or type it in. If
you were not given barcodes to use, enter the following instead, replacing
PROJwith your project's short name.PROJ-201PROJ-202PROJ-203PROJ-204
- External Name: Again, this is the name of the individual, whether internal or external.
Here's a suggested list. Replace
PROJwith your own project short name.PROJ_ID1PROJ_ID2PROJ_ID3PROJ_ID4
- Because you've already created an Identity with the external name
PROJ_ID1, it is found as a match to the external name you entered for the top row. In theIdentity Aliasdropdown menu for the first row, select the existing Identity. - Select
First Receiptfrom the dropdown menu in each remaining cell of theIdentity Aliascolumn.
If you have a label with an incrementing number (e.g., 1, 2), enter two rows, select them, then double click the
blue square.
-
Secondary ID: enter
BioBankID 3in the second row. Select the Secondary Identifier fields for rows 1 and 2, then double click the blue square to fill down rows 3 and 4. -
Click Save at the upper right hand corner.
If everything is correct, the Sample Alias and Sample Name will be auto-generated for each row and the samples will be saved.
Record the external name, sample class, alias, and barcode of each
sample in your worksheet.
If you navigate back to your Edit Project page, there should be nine samples:
- 4 Identity samples
- 5 Tissue samples
2.4 Receipt Transfers
When receiving samples, you can enter some receipt information including a date and time, the lab that the samples came from, the internal group who was responsible for receiving them, a verification that they were received as expected, and that a QC check was performed on them. Entering this information causes a Transfer to be recorded. We will have a look at the transfer that was created from the data you entered in exercise 2.3.
- On the main menu under Preparation, click Samples.
- Click the alias of a sample you created in exercise 2.3. This takes you to the Edit Sample page, which gives you a detailed view of the individual sample and other items related to it.
- On the Edit Sample page, scroll down to the Transfers section. You should see a single transfer in the list.
- Click the ID of the transfer to go to the Edit Transfer page, which gives you a more detailed view of the transfer.
- Scroll down and look at the Items section on the Edit Transfer page. If you create multiple items in the same project with the same date and time of receipt, they will be included in the same transfer.
Receipts are one type of transfer. You can also create internal transfers when items are transferred between different groups within your organization, and distribution transfers when items are transferred out of the organization. This allows you to track the complete chain of custody.
2.5 Receiving Stock DNA/RNA
The process for receiving stock is very similar to receiving tissue. Every stock derives from a tissue, which originated from an Identity. MISO will automatically create a tissue for you when you enter a stock. This tissue does not represent a sample that is present at your site, but is created so that tissue-level information about the sample can still be recorded. This tissue sample is referred to as a ghost sample.
In this section, we will 'receive' a single stock DNA tube from the tissue material of an existing identity.

- On the left hand menu under Preparation, click Samples.
- Click the Create button at the top left of the table.
- Select Sample Category
Stockand Quantity1. - Click Create.
- In the table, enter or select the following:
- Sample Name: Leave blank. This will be auto-generated after save.
- Sample Alias: Leave blank. This will be auto-generated after save.
- Description:
Stock 1. - Date of receipt: Select a date.
- Received From: Select any lab.
- Received By: Select any group.
- Project: Select your project's short name from the drop-down.
- Subproject: Select the subproject you created.
- Sample Class: Select
gDNA (stock)from the drop-down. - Sample Type: Select
GENOMICfrom the drop-down. - Scientific Name:
Homo sapiens. - External Name:
PROJ_ID2(wherePROJis your project's short name). - Identity Alias: The existing identity should be selected automatically in the dropdown menu.
- Tissue Origin:
nn (Unknown) - Tissue Type:
R (Reference or non-tumour, non-diseased tissue sample) - Times Received:
1 - Tube Number:
1 - Secondary ID:
BioBankID 6. - Timepoint:
T1 - STR Status: select any value from the dropdown menu.
- Volume:
300 - Vol. Units:
µL - QC Status: select
Readyfrom the dropdown.
- At the upper right hand side, click Save.
When you click 'Save', the name and alias will be filled in. Record the external name,
sample class, and alias in your worksheet.
After saving, go back to your project page and look at the samples that were automatically created. Although you received a gDNA (stock), it has created a Tissue for you as well.
- Click on the tissue with tissue origin
nn (Unknown)and tissue typeR (Reference or non-tumour, non-diseased tissue sample).
At the top, you will see a grey section with the warning: "This entity does not exist except for sample tracking purposes!". This indicates that it is a ghost sample used only for informational purposes, and is not a physical sample that could be found on premises.
2.6 Scanning tissues and stocks into a Box
In this section we will add the stocks and tissues you just received into your inbox for further work.
Boxes hold samples, libraries, library aliquots, and pools. They do not track reagents or primers. Boxes are separated into uses for different kinds of storage (e.g., tissue samples versus extracted DNA), but there is no check that items in a box match. Each box also has a size that includes the physical dimensions of the box as well as whether the box is compatible with the VisionMate scanner. Every position in the box is identified by a standard row letter + column number format (e.g., C05).
In this exercise, we are going to take samples/libraries/pools from the previous team/collaborator by scanning them out of the previous box and into a newly created 'inbox'.
If you haven't already created an inbox, create one now:
- From the navigation panel, choose Boxes.
- Click Add at the top right of the table.
- In the Create Boxes dialog, leave the Quantity at 1 and click Create.
- On the Create Box page, enter the following information:
- Alias:
XX Inbox, replacingXXwith your own initials. Record this alias in your worksheet. - Description: a human description of the box purpose
gDNA ready for
library prep for <project>
. - Box Use: The contents of the box. Select an appropriate use for your entities.
Record the use in your worksheet.
- Box Size: Select
8x12 Storage (scannable).
- Alias:
- Click Save.
Upon clicking save, a graphic of the box will appear.
![]()
You can now fill the box with the samples, libraries, library aliquots, or pools that were made in previous steps. Collect the appropriate matrix tubes/barcodes now.
- Click on a position in the displayed Contents grid.
- Enter a matrix barcode into the Search box on the right and click Lookup. Normally a hand scanner would be used. You can also search for items by their name or alias
- Click Update Position.
- ⚠ The Save button at the top of the page does not work for individual positions, only for Box Information.
- Repeat for as many samples/libraries/library aliquots/pools as you want.
The table below the box diagram shows the position and information for the currently selected sample. If you would like to see all of the samples in the table, click the List all Box Contents button at the top right of the table.
In the lab, it is possible to use Options > Scan Box to use the plate scanner and update all positions at once, but that will not be covered in this tutorial.
Using Boxes
Boxes can be found either from the Sample or Library page or the Boxes page.
- On the Samples or Libraries page, search for one of your sample or library aliases and click on its alias to load the page.
- The Box and position is listed under Box Location in the Sample Information
or Library Information section. Click on the link to go to the Box (e.g.
PROJ_OUTBOX, A03).
Boxes can be used to store Samples, Libraries, Library Aliquots, and Pools and one box can store all four types.
3. Propagating Samples
Samples in MISO exist for each step of the sample preparation process: from identity, to tissue, optionally through tissue preparation, to stock, to aliquot. At each step, the possible options are limited based on the established workflows. Group IDs may be assigned at any time and are copied when propagating. Different QC information is available at each step. For instance, STR status is attached to the stock.

3.1 Propagating to Tissue Processing
Tissue processing is an optional step between the tissue and stock levels of the sample hierarchy. It includes steps such as slides and laser capture microdissections created from the tissue.
Create a Slide from one of your Tissue samples.
- On the Samples page, enter your project short name in the search box.
- Check the box for the Tissue you created in exercise 2.1. It will have tissue origin Ly (Lymphocyte) and tissue type R (Reference or non-tumour, non-diseased tissue sample).
- Click the Propagate button at the top left of the table.
- Enter
1replicates toTissue Processing. - Click Propagate.
- Fill out the table:
- Description: CV Slides
- Sample Class:
Slide - Sample Type:
OTHER - Slides: 3
- Stain: Choose any option from the dropdown.
- QC Status:
Ready
- Click Save.
Upon successful save, a green status bar will show at the top that says "Saved 1
items". The sample name and alias will have been filled in automatically.
Record the alias in your worksheet.
3.2 Bulk Propagate Samples
For three of the Tissue samples created previously (by bulk entry), we will create stocks for library preparation.
- On the Samples page, enter your project short name in the search box.
- Check the boxes for any three of the the Tissue samples with tissue type P (Primary Tumour) that you created in section 2.3.
- Click the Propagate button at the top left of the table.
- Enter
1replicates toStock. - Click Propagate.
- Fill out the table:
- Matrix Barcode: Choose a barcode for each stock. If you were not given barcodes to use,
enter the following instead, replacing
PROJwith your project's short name. Record the barcodes on your worksheet.
PROJ-301PROJ-302PROJ-303
- Sample Class:
gDNA (stock) - Sample Type: Select any value if one is not selected automatically.
- STR Status: Select any value from the drop-down.
- Volume:
300 - Vol. Units:
µL - QC Status:
Not Ready
- Matrix Barcode: Choose a barcode for each stock. If you were not given barcodes to use,
enter the following instead, replacing
- Click Save.
Upon successful save, a green status bar will show at the top that says "Saved 3
items". The sample names and aliases will have been filled in automatically.
Record the aliases in your worksheet.
3.3 Bulk Editing
Samples can be edited in bulk. Assume that we have done some quality control and wish to update the QC status of the samples.
In this case we will update several fields of 4 stock samples. We will use the stocks we entered in the previous step as well as the reference stock entered in part 2.4 of this tutorial.
- On the Samples page, enter your project short name in the search box.
- Check the boxes for the gDNA (stock) samples (propagated and received) that you created in sections 2.4 and 3.2.
- Click the Edit button at the top left of the table.
- Add a Concentration value: any number
- Change the QC Status column to
Readyfor all rows. - Enter a Matrix Barcode for the stock entered in section 2.4. If you weren't given a
barcode to use, enter
PROJ-401, replacingPROJwith your project's short name. Record the barcode on your worksheet. - Click Save.
Upon successful save, a green status bar will show at the top that says "Saved 4 items.".
3.4 Creating Aliquots
Propagate again from the 4 gDNA (stock) samples to gDNA (aliquot).
- If you are continuing from the end of section 3.3 Bulk Editing, do not
navigate away from the page.
- At the top left of the table after saving samples, click the Propagate button and continue to step 3.
- Otherwise, select samples using the following:
- On the Samples page, enter your project short name in the search box.
- Check the boxes for the gDNA (stock) samples.
- Click the Propagate button at the top of the table.
- A dialog will appear. Select
1replicate toAliquotand click Propagate. - Fill out the table:
- Sample Alias: Skip this field. It will be automatically filled in upon save.
- Matrix Barcode: choose a barcode for each aliquot. If you weren't given barcodes to use, enter the following
instead, replacing
PROJwith your project's short name. Record the barcodes on your worksheet.
PROJ-501PROJ-502PROJ-503PROJ-504
- Sample Class: Select
gDNA (aliquot). - Sample Type: Select any value if one is not selected automatically.
- QC Status: Select
Ready. - Purpose: Select any option from the dropdown.
- Click Save.
Upon successful save, a green status bar will show at the top that says "Saved 4
items". Buttons to allow editing the samples or propagating them will show at
the top of the table. The sample names and aliases will have been filled in
automatically. Record these on your worksheet.

4. Sample QCs
4.1 Adding Sample QCs
Several QC methods are supported in MISO. The same process can be used to add QCs to a single or multiple samples at once.
- On the Samples list page, enter your project's
short name in the search box and press the
Enterkey on your keyboard. - Check the boxes for the samples that you created in exercise 3.4.
- Click Add QCs at the top left of the table.
- Enter
1QC per sample and1control per QC, and click Add. - Fill out the table for each row as follows:
- Date: enter today's date
- Type: Select one of the available QC methods.
- Instrument: Depending on the QC type, you may have to indicate which instrument was used. If required, chose any instrument.
- Kit: Depending on the QC type, you may have to indicate which kit was used. If required, choose any kit.
- Kit Lot: If you entered a kit, also include a LOT#. Use the current date. e.g.
2020-07-17 - Result: Enter a value that makes sense for the QC. Some QCs are pass/fail, while others have a numerical result.
- Control 1: Depending on the QC type, you may have to indicate which control(s) were used. If required, choose any control.
- Control 1 LOT#: If you entered a control, also include a LOT# for it. Use the current date. e.g.
2020-07-17. - Control 1 Passed?: If you entered a control, select
Trueto indicate that the control ran as expected. - Click Save.
The QCs will now be visible on the individual Edit Sample page.
- On the Samples list page, enter your project name in the search box and press the
Enterkey on your keyboard. - Click one of the samples you previously selected.
- Scroll down to the QCs section. The QC you just entered should appear in the table.
5. Scanning aliquots into outboxes
Finally, update your outbox with your samples/libraries/pools to pass them on to the next team or to put them into storage.
If you haven't already created an outbox, create one now:
- From the navigation panel, choose Boxes.
- Click Add at the top right of the table.
- In the Create Boxes dialog, leave the Quantity at 1 and click Create.
- On the Create Box page, enter the following information:
- Alias:
XX Outbox, replacingXXwith your own initials. Record this name in your worksheet. - Description: enter a human description of the box purpose
- Box Use: The contents of the box. Select an appropriate use for your entities. Record the
use in your worksheet.
- Box Size: Select
8x12 Storage (scannable).
- Alias:
- Click Save.
Add each of the samples/libraries/pools that you created to the box.
5. Advanced Search
Some of the list pages feature advanced search functionality which allows you to narrow down the items displayed by specifying which attributes you would like to search by. Any list featuring advanced search will display a question mark in a black circle beside the Search bar.
- Go to the Samples list page.
- Hover your mouse over the question mark icon beside the Search box. The list of search terms that you can use is displayed.
- Click the question mark icon. A dialog appears describing the search syntax in more detail.
- Click the X in the top right corner of the dialog to dismiss it.
- In the Search box, type
PROJ entered:today is:real, replacingPROJwith the short name of your own project, and hit Enter on your keyboard. All of the samples you created in your project today will appear. The ghost samples that were automatically created will be excluded from the list.
Troubleshooting
How can I delete samples?
Samples can be deleted from the Samples list page by selecting the samples and clicking Delete. A sample cannot be deleted if it has any child samples or libraries. Only the sample's creator or an admin can delete a sample. Deleted items are listed on the Deletions list page. Deleting a sample is permanent and cannot be undone.
What do I have to enter if receiving a pre-made library?
You do not need to create any samples before receiving a library. Library receipt is detailed in a later tutorial: Receiving Libraries
How do you work with multiple samples derived from the same identity (i.e. DNA and RNA from one tissue slide, DNA from metastasis and control)
On the Samples page, you can enter the identity's alias into the search box to filter the list.
If the samples you are looking for have more of their alias in common, you can enter as much as
they share to further narrow the search. e.g. to find all stock samples made from tissue
PROJ_0001_04, you could search for PROJ_0001_04.
Once you have found all of the samples you wish to work with, select them by clicking the checkboxes on the left, and choose a bulk action from the menu at the bottom.
How do I correct a sample that has the wrong information, e.g. wrong tissue type?
Most sample attributes may be modified either individually, or in bulk. To access the Edit Sample page for a single sample, click the sample's name or alias on the Samples page. To bulk edit a set of samples, click the checkboxes next to them on the Samples page and click Edit at the top left of the table.
For attributes which cannot be changed via MISO (e.g. Sample Class), email gsi@oicr.on.ca or file a JIRA ticket in GSI Common for help. This may require deleting and re-creating the sample.
What if I need to change the parent of a sample? (e.g. for swaps)
A sample's parent cannot be changed. You will have to delete and re-create the sample by propagating from the correct parent sample.
How can I add a new lab, tissue material, tissue type, tissue origin, or add anything else in drop-down menus?
Some of these items can be added directly:
- From the Misc or Configuration section of the menu, click the category of interest.
- Click Add from the toolbar.
- Enter the appropriate information.
- Click Create.
For items that you are not able to add yourself, please email gsi@oicr.on.ca or file a JIRA ticket in GSI Common for assistance.
| < Project Coordination | Home | Libraries > |